FTTC (up to 80Mb), FTTP (up to 1GB), Leased lines, VoIP from £6/ month, Security software, Office 365, Email etc.
When you need value for money and quality of service without the drama phone 028 8283 1111
Select a quick link > Control panel - Rise a ticket - Remote assistance
Exchange email backup
If you wish to take a backup of your email, you can do it for free from within Outlook, using this step by step guide.
Enable Cached Mode
Before starting the backup, make sure you have all the email stored locally on your computer. To do this, you must enable Cached mode in your Outlook.
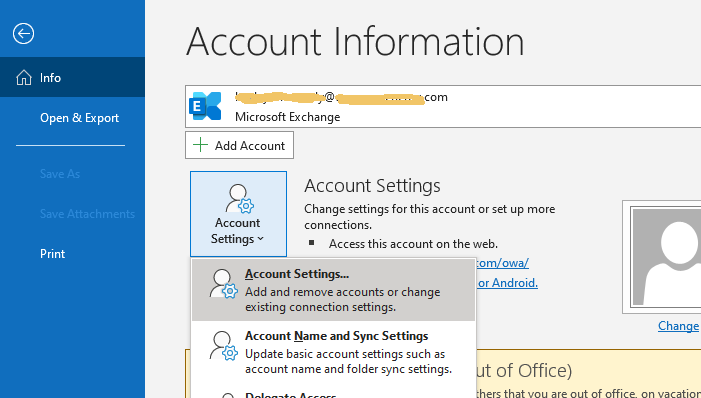
Load Outlook. Select ‘File‘ and select ‘Info‘, > ‘Account Settings‘ then ‘Account Settings‘ (different link) as in the pic below.
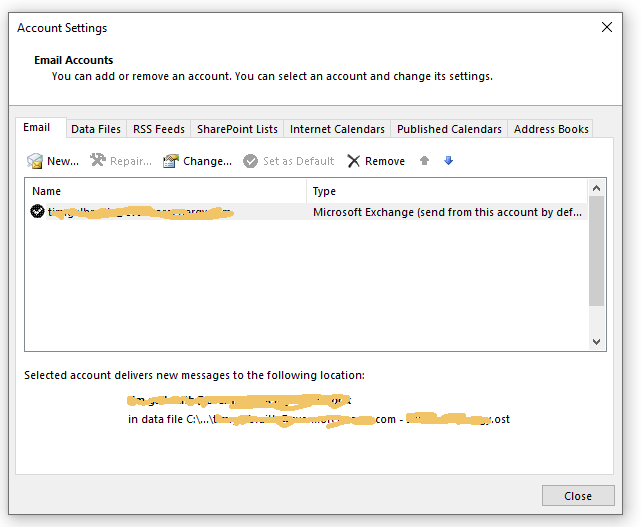
Select the email address
There may be several email addresses in the list. Each email address will need to backed up, one at a time. In the example below there is only one email address listed. Double click the relevant email address or select the relevant email address and select ‘Change…‘.
Cache all your email locally
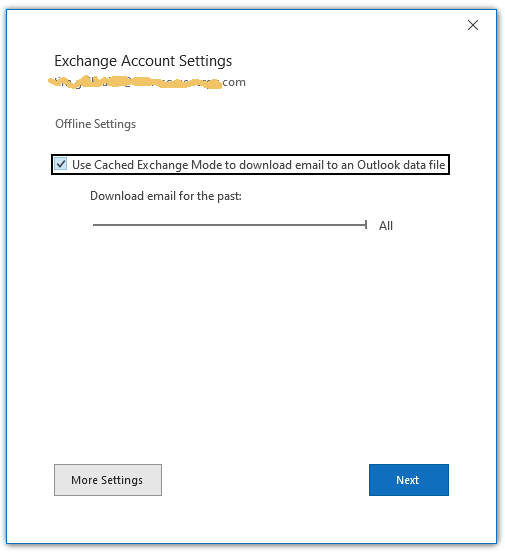
You need to Cache all your email as in the pic below. This means that the next time you click Send/Receive, all your email will be downloaded onto your local computer – ready to be backed up. Make sure;
- The tick box is ticked.
- The slider is all the way over to the right so that all your email will be downloaded to the local computer.
Select ‘Next‘.
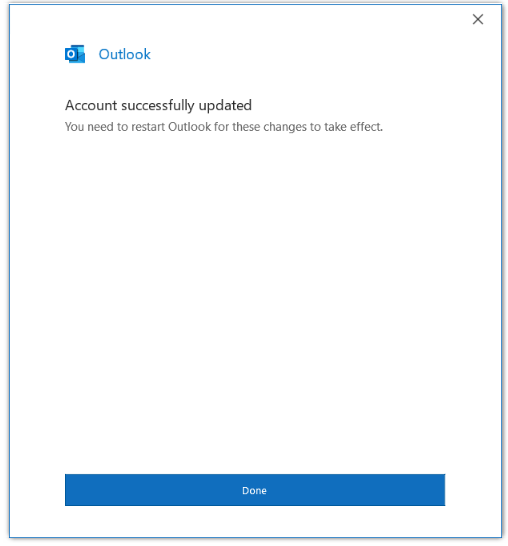
Select ‘Done‘ and re start Outlook if instructed to do so.
When back in Outlook, select ‘Send / Receive‘ to make sure all your Hosted exchange email is copied from the Hosted Exchange server onto your local computer..
Note; If your online data file is over 4GB, Outlook will say there is only 4GB to be downloaded. Once the 4GB is downloaded Outlook will show there is a very small amount of data left on the Hosted exchange server to download. This is an Outlook problem. Best thing to do is to wait until Outlook has finished downloading all the email and outlook shows ‘All folders are up to date’ (Bottom line on the right). You can interrupt the download and Outlook will pick up from where it left off.
Start the backup procedure
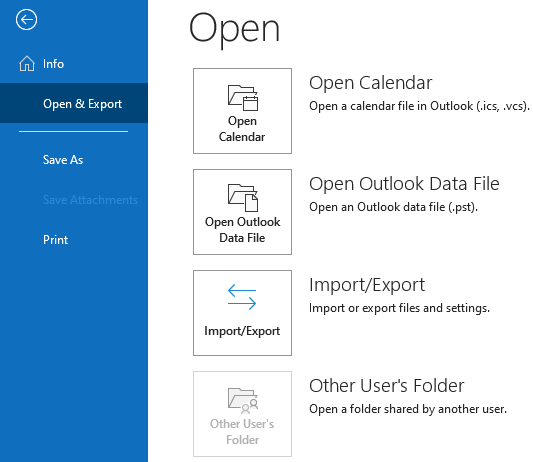
Select ‘File‘ > ‘Open & Export‘ then ‘Import/Export‘ as shown in the pic below.
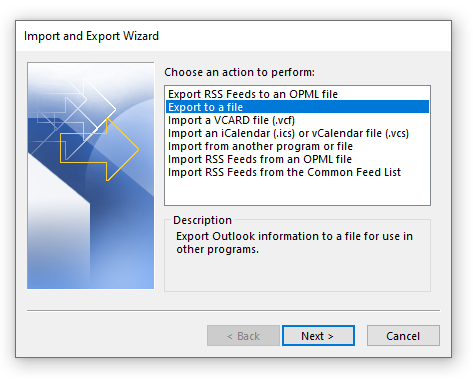
Export to a file
Select ‘Export to a file‘ form the list of options.
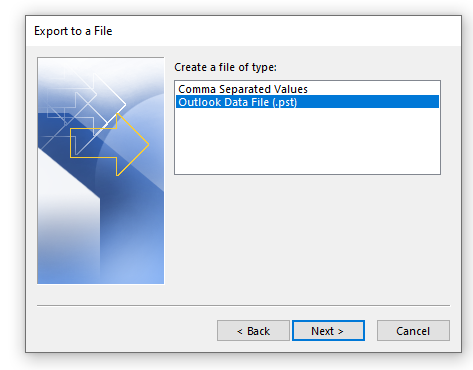
Export Data File (.pst)
Select ‘Outlook Data File (.pst)‘ and select ‘Next >‘.
Export the Data file
Select the data file you wish to export and select ‘Next >‘. The name of my data file is ‘colum@meganet.com’ and the name of your data file will be different.
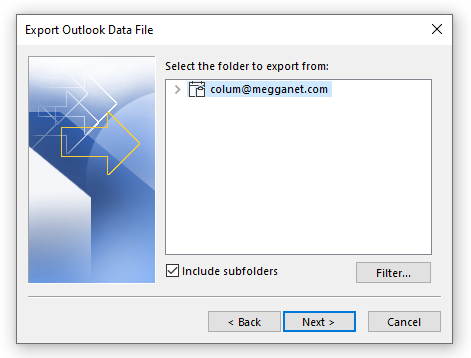
Also, make sure that you tick the ‘Include subfolders‘ as this should also backup all your sub folders.
Select backup folder and backup name
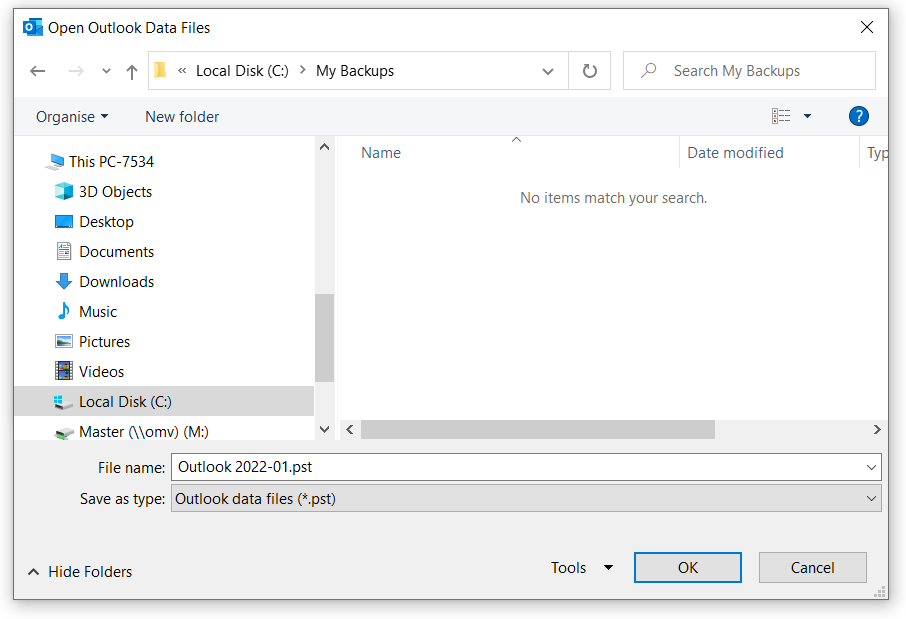
In the example above, the data file is called ‘Outlook 2022-01.pst’ This shows that the file is an Outlook data file. The date is in reverse format so that when you view a folder and sort by name, the backups will be listed in the correct order.
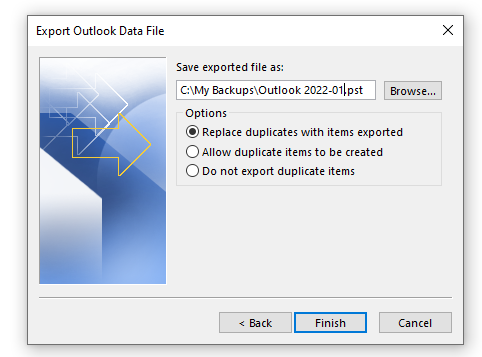
Since we are doing a full backup, We can levee the pre selected radio button at ‘Replace duplicates with items exported‘. Select an appropriate backup folder and name your backup and select ‘Finish‘.
Selecting a backup folder
Make sure you choose a folder on a drive which will have enough room to contain the backup. You can check the size of the Outlook data file by going to the folder it is stored in and checking its property’s. Another way to check its size is to open Outlook, Right mouse click the data file (on the left) and select property’s.
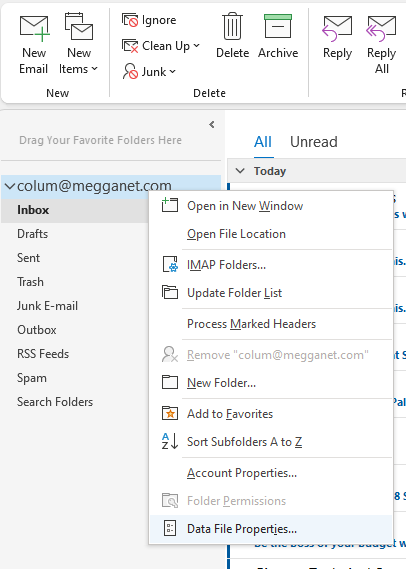
Check data file size
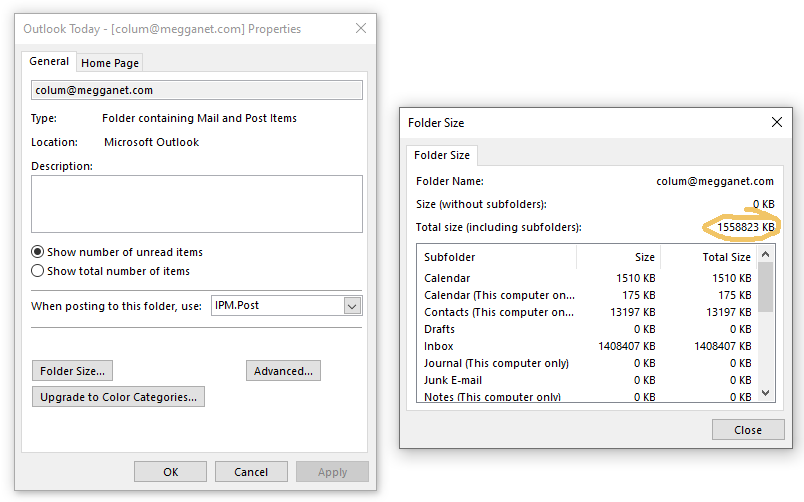
As you can see in the above pic, the Total size of the data file is 1558823Kb or 1558.824Mb or 1.558824Gb.
Choose a password to protect your backed up data file
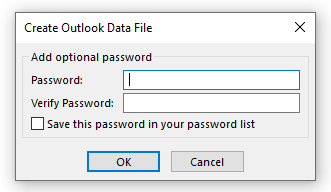
Once you select OK, the backup will start. The backup procedure may take some time depending on the amount of data being backed up, the speed of the backup device and the performance of the computer.
Repeat the procedure for all the email addresses you need to backup.